Optimize Email Delivery with Brevo (formerly SendinBlue)
Ensure fast, reliable email sending by integrating Brevo with Pro Mail SMTP. This powerful combination boosts your deliverability and keeps your communications on point — every time.
INTEGRATE BREVO FOR FREE
How to Set Up Pro Mail SMTP with Brevo for Effective Email Delivery
Brevo (formerly SendinBlue) is a reliable email service provider that specializes in both transactional and marketing email delivery. With a strong focus on high deliverability rates and performance, Brevo ensures that your emails reach their intended recipients promptly and securely. This makes it an excellent choice for businesses looking to improve their email communication and foster better engagement with their audience.
By integrating Brevo with Pro Mail SMTP, you can streamline your email sending process, reduce the likelihood of emails landing in spam folders, and take full advantage of Brevo’s advanced features, including real-time analytics, detailed reporting, and automation capabilities.
This comprehensive guide will walk you through the essential steps to set up Brevo with Pro Mail SMTP.
What is Brevo?
Brevo is a leading email marketing and transactional email service provider that helps businesses manage their email communications efficiently. With a strong focus on deliverability and user engagement, Brevo offers a suite of tools designed to optimize email campaigns and improve overall communication strategies.
One of the key advantages of using Brevo is its user-friendly interface, which simplifies the process of creating and managing email campaigns. The platform includes advanced features such as real-time tracking, detailed analytics, and automation capabilities, allowing businesses to tailor their messaging and improve engagement with their audience.
Brevo is an excellent choice for businesses seeking a reliable and scalable email delivery solution, providing the tools necessary to optimize email performance and enhance user engagement.
Key Features:
Cost: Brevo offers a free plan that allows you to send up to 300 emails per day, making it an excellent option for startups and small businesses. For larger email volumes, paid plans are available, providing scalability as your needs grow.
From Email Requirements: while Brevo can work with various From Email addresses, it is recommended to use a domain-specific address (e.g., info@example.com) to enhance deliverability and ensure that your emails are recognized as legitimate by recipient servers.
Bottom Line: Brevo is a reliable email service provider known for its high deliverability rates and user-friendly interface. Its combination of a free tier and advanced features makes it a strong choice for businesses looking to optimize their email communication.
Step 1: Create a Brevo Account
To integrate Pro Mail SMTP with Brevo, you first need to create an account.
Creating a Brevo Account
- Visit the Brevo Website.
Go to Brevo.com. - Sign Up for an Account.
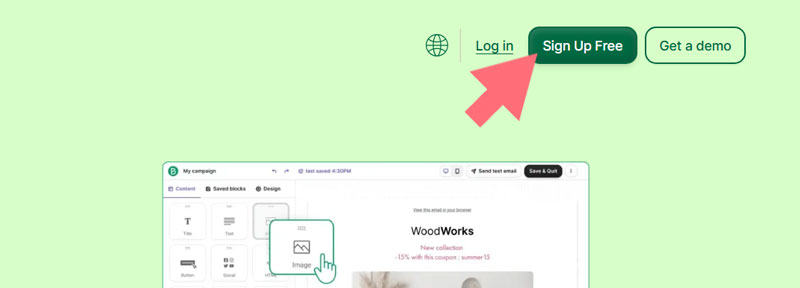
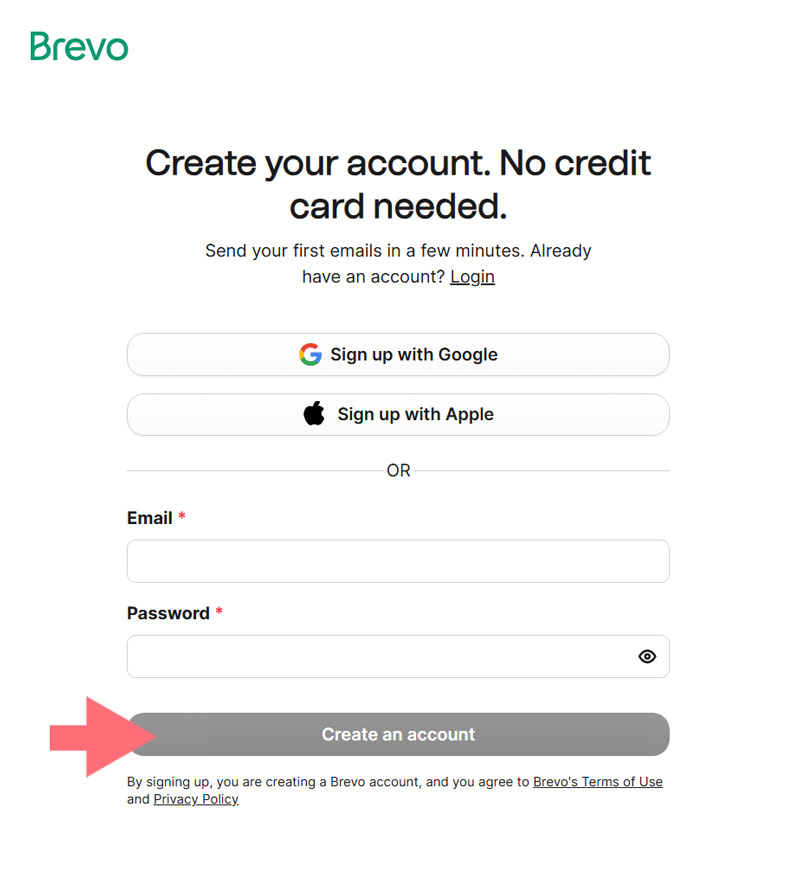
Click on the Sign Up Free button and complete the registration form with your details.
- Verify Your Email Address.
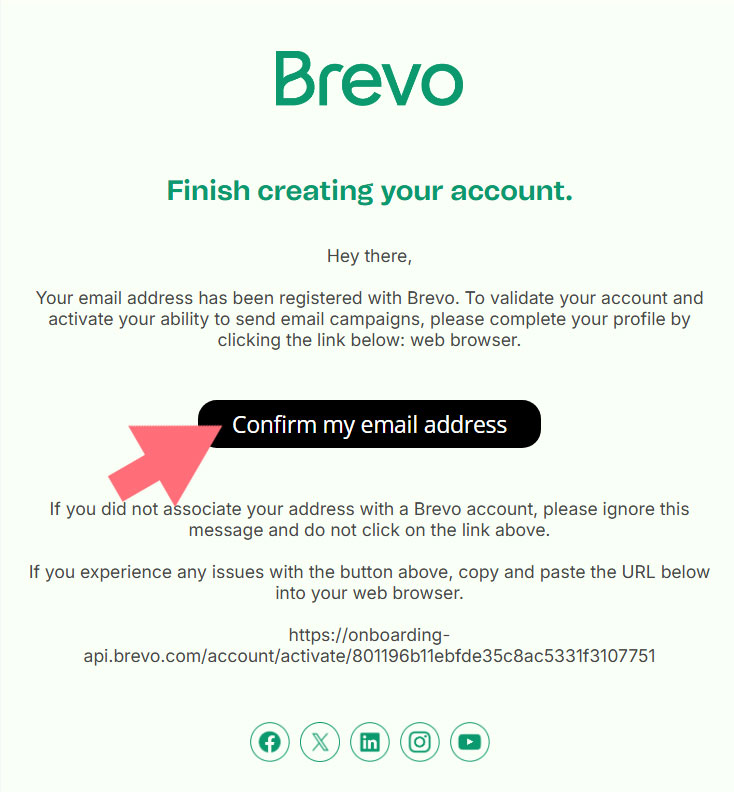
After signing up, check your email for a verification link from Brevo. Click Confirm my email address to activate your account.
- Provide Your Details.
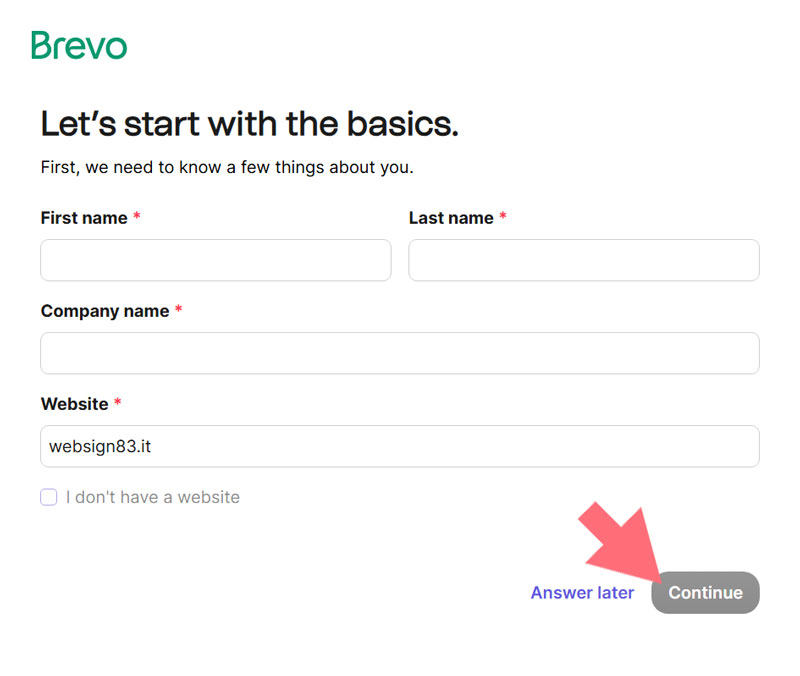
At this point, you will be redirected to a page where you need to provide some information about yourself, starting with your name and company name.
- Enter Company Information.
Brevo will then ask for your company address. Fill in these details accurately.
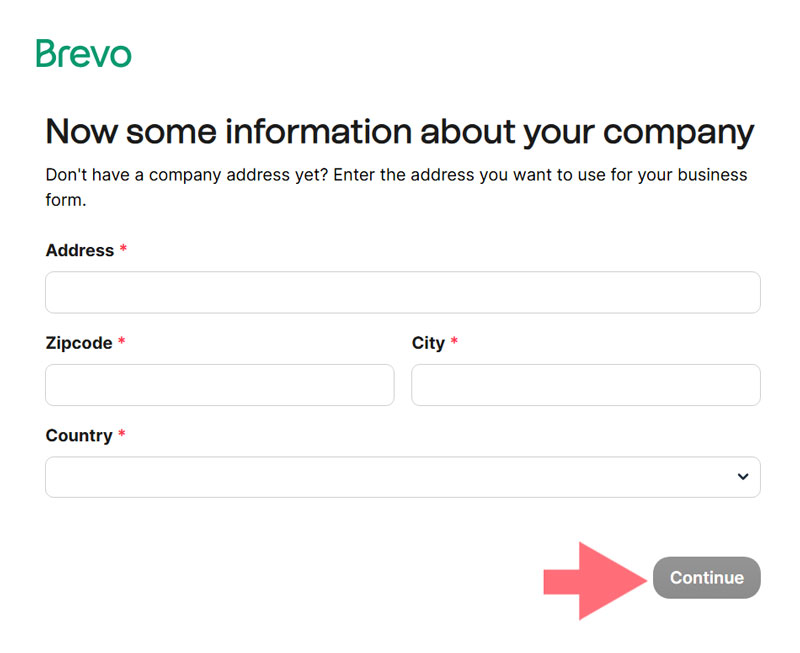
- Additional Company Details.
Next, you will be prompted to provide information such as the number of team members, the size of your mailing list, and whether you plan to sell products online.
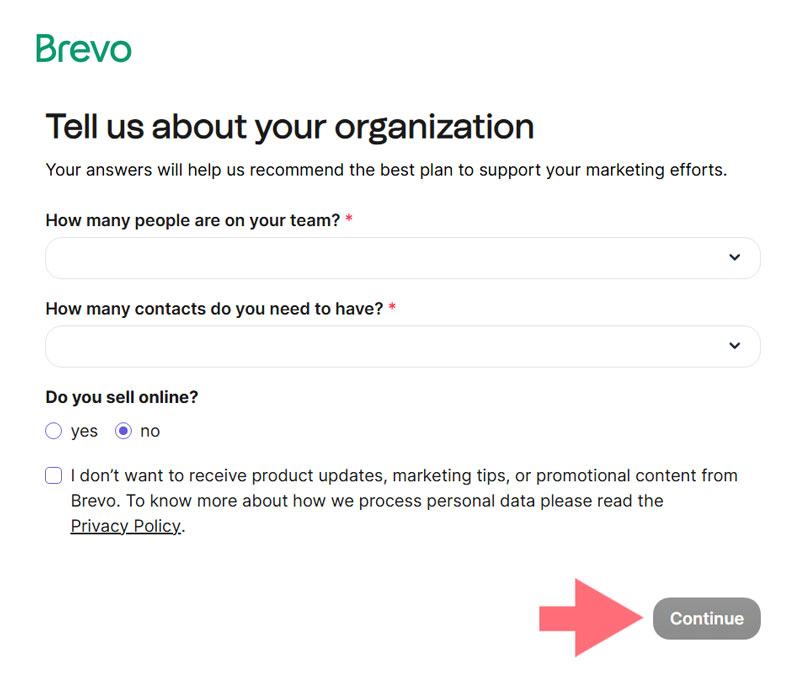
- Enter and Verify Your Phone Number.
After completing the previous fields, you will need to input your phone number. Once you’ve done that, click the Send verification code to continue. Once you receive the verification code, enter it in the designated field and proceed to the next step.
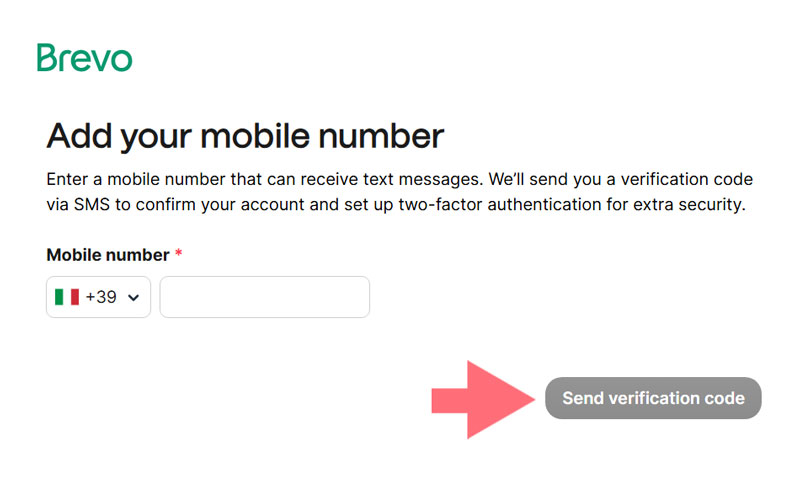
- Choose Your Plan.
After filling out all the required fields, you will be able to select a plan. For this setup, we’re going with the Free option, but the process is similar for any paid plans you might consider.
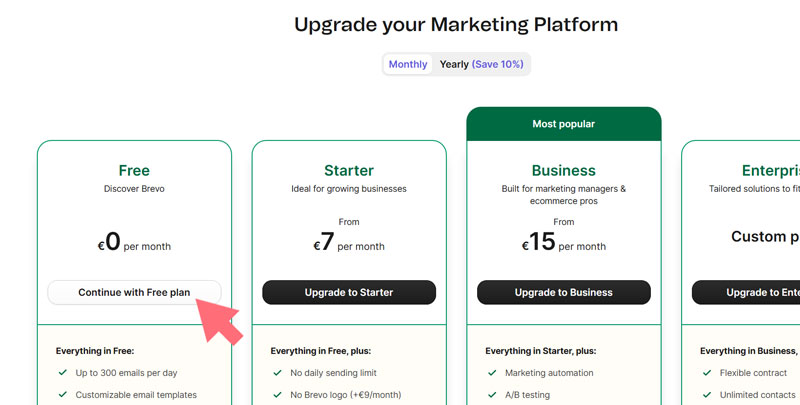
After setting up your account, you can move on to the next step.
Step 2: Authorizing Your Domain
To ensure successful email delivery, it’s crucial to authorize your domain in Brevo. This domain must correspond with the one used in your From Email address. For instance, if your From Email is pattie@example.com, you will need to verify the domain example.com in your Brevo account.
Setting Up Your Domain in Brevo
- Log Into Your Brevo Account.
Start by accessing your Brevo dashboard with your login credentials. - Go to Sender Settings.
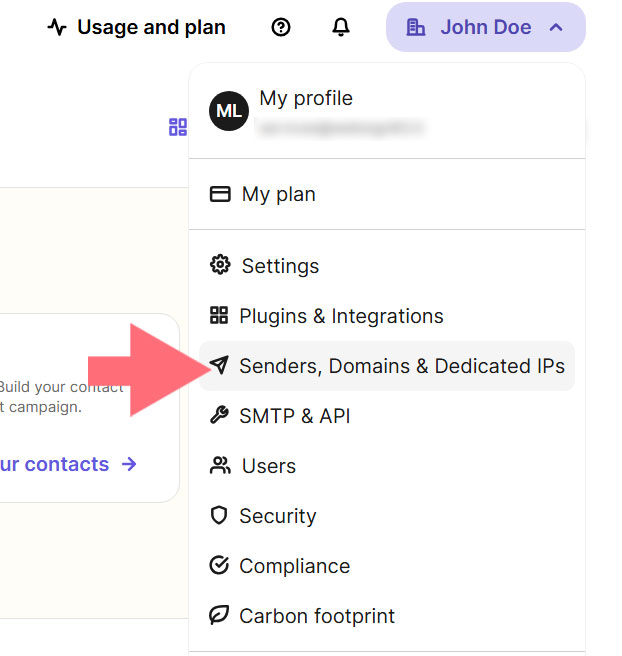
Click on your company name located in the top right corner, then select Senders, Domains & Dedicated IPs from the menu options.
- Add a New Domain.
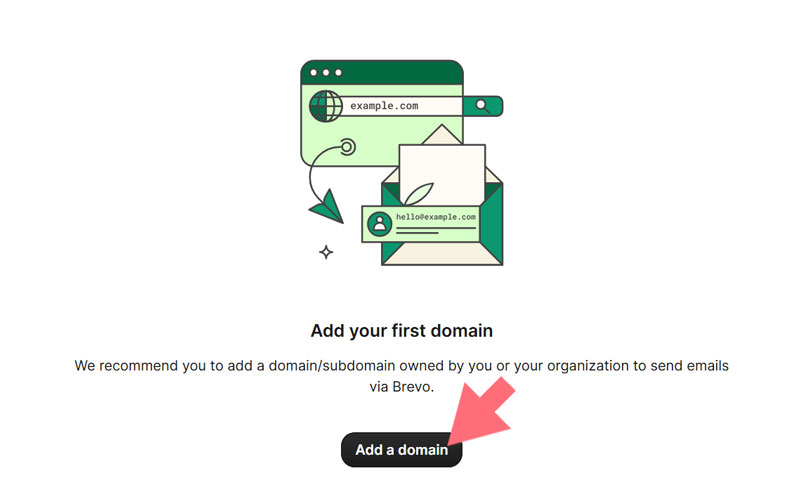
On the next page, find the Domains option and click on it. Click on the Add a Domain button to initiate the domain verification process.
- Input Your Domain Information.
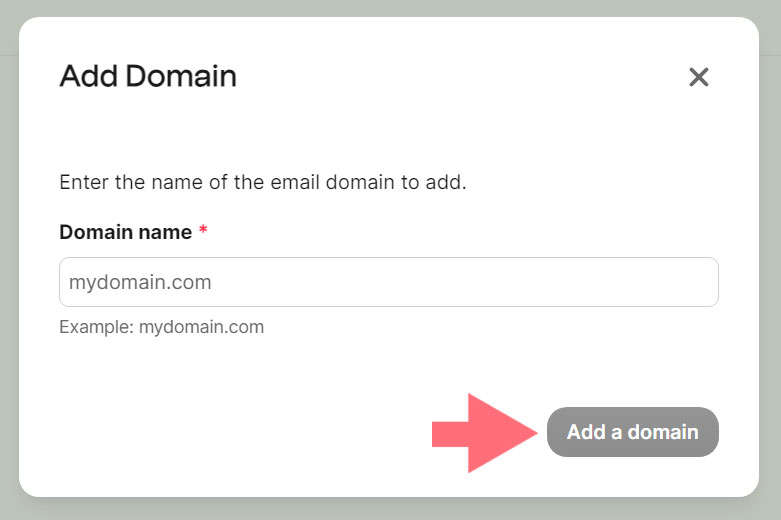
Enter the domain you wish to verify (e.g., example.com). It’s advisable to use a subdomain dedicated to email sending, such as mail.example.com. Then click Add a domain.
- Authenticate Your Domain.
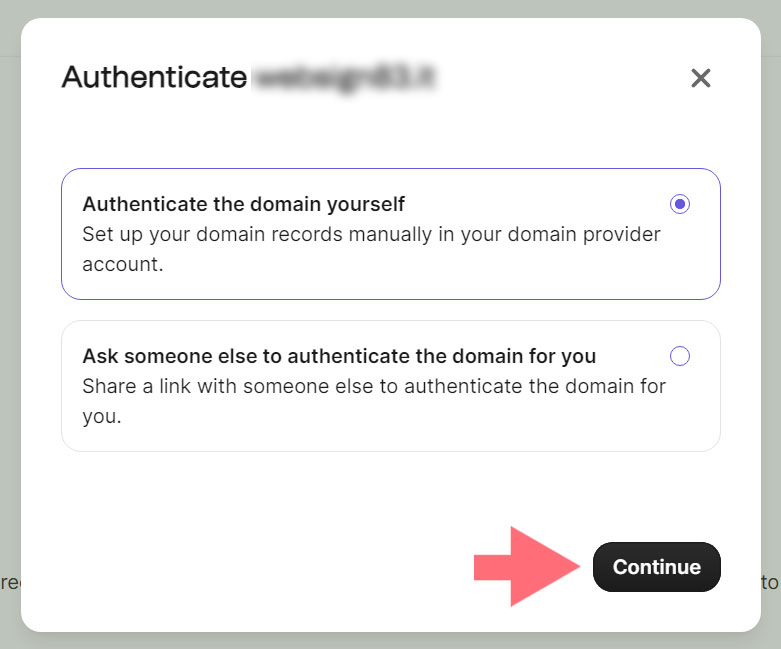
At this point, you can choose to either authenticate the domain yourself or share a link with someone else to do it for you. In this case, I decide to click on Authenticate the domain yourself. Then, click on Continue.
Adding DNS Records
After saving your domain, Brevo will provide specific DNS records that you need to add to your domain’s DNS settings. This step is essential for verifying your domain and ensuring reliable email delivery.
- Access Your DNS Management.
Open a new tab and log in to the platform where you registered your domain (usually your hosting provider). Locate the DNS management section for your domain.
💡Note
If you have trouble finding your DNS settings or feel uncertain about making changes, contact your hosting provider for guidance.
- Add the Required DNS Records.
In your DNS settings, look for an option to add new records. You will need to add the TXT records provided by Brevo. Ensure you copy the values accurately, as they are critical for successful verification.
We’ll explain how to add each DNS record in detail below, using example.com as a placeholder. When updating your own DNS settings, be sure to replace it with your actual domain name.
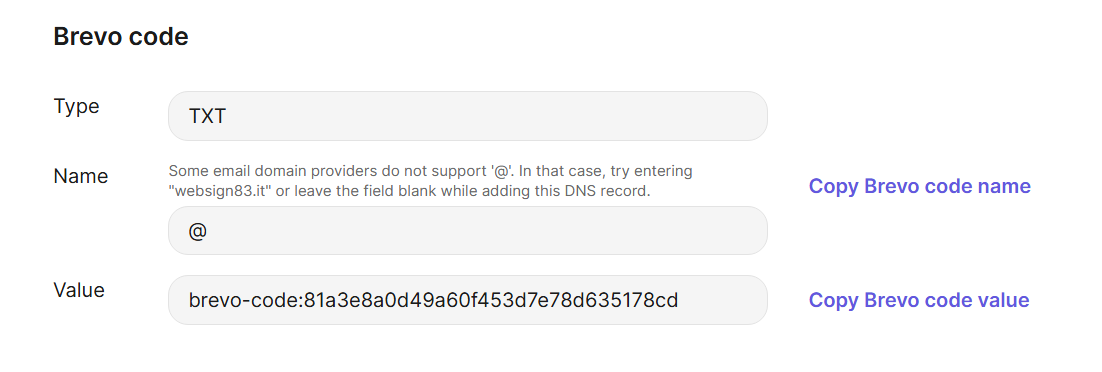
TXT Record (Brevo code):
- Host/Name: example.com
- Record Type: TXT
- TTL: 24 hours (or 86400 seconds)
- Text/Data: copy the value from Brevo
TXT (DKIM) Record:
You’ll have to add 2 DKIM records. An example could be:
- Type: TXT
- Name: mail._domainkey
- TTL: 24 hours (or 86400 seconds)
- Value: copy the value from Brevo


💡Tip
If you’re using GoDaddy to manage your DNS, make sure to set the TTL (Time To Live) to 1 hour. This value should be applied to all three DNS records.
TXT (Optional DMARC Record for Google and Yahoo Users):
Establishing a DMARC policy on your domain is recommended to meet the latest sender requirements from Google and Yahoo.
- Host/Name: _dmarc
- Record Type: TXT
- Text/Data: copy the value from Brevo.

- Verify Your DNS Records.
After adding the records, return to your Brevo dashboard and click the Authenticate this email domain button to check if the records are correctly configured.
DNS changes can take from 24 to 48 hours to propagate. If you encounter issues during verification, you can attempt to verify again later. Once Brevo verifies your records, you will see a green Value Matched status next to each record in your dashboard.
While you wait for the verification to complete, there’s no need to pause your setup process. You can continue with the next steps, but be sure to keep this tab open for future reference.

💡Important Note
If you are verifying a subdomain, make sure to use the same subdomain in the From Email setting in Pro Mail SMTP (e.g., john@subdomain.example.com).
Step 3: Generate Your Brevo API Key
To connect Pro Mail SMTP with Brevo, you will need to generate an API key. This key is essential for authenticating your email sending and ensuring secure communication between your WordPress site and Brevo.
Generating Your API Key
- Log In to Your Brevo Account.
Open your Brevo dashboard by logging in with your credentials. - Access the API Settings.
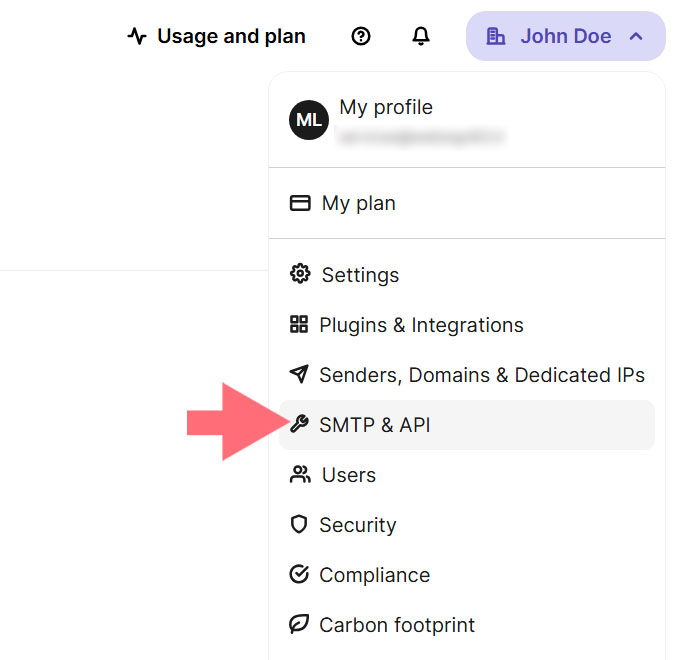
Click on your account name or profile icon in the top right corner of the dashboard, then select SMTP & API from the dropdown menu.
- Navigate to API Keys.
On the SMTP & API page, switch to the API Keys tab. - Create a New API Key.
Look for the option that says Generate a new API key. Click on this link to initiate the creation of your v3 API key.

- Name Your API Key.
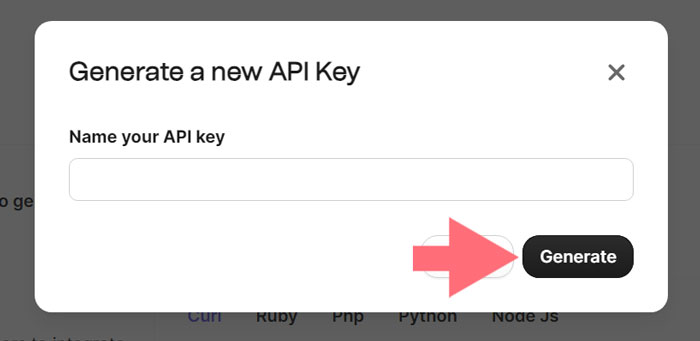
A prompt will appear asking you to name your API key. Choose a descriptive name that helps you remember its purpose (e.g., Pro Mail SMTP Integration).
- Generate the Key.
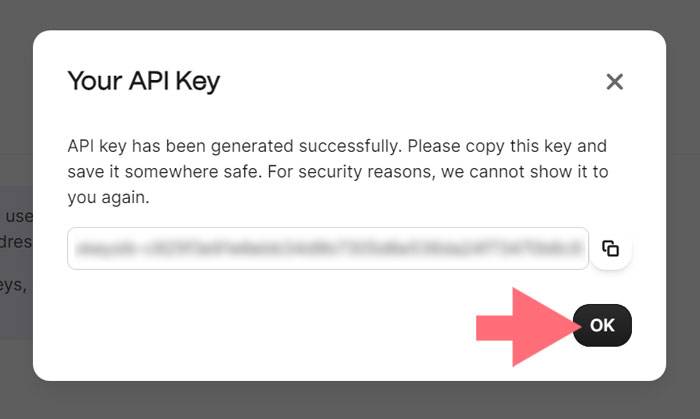
After naming your API key, click the Generate button. A new modal window will appear displaying your newly created API key.
💡Important Note
Make sure to copy this key and store it securely, as it will only be displayed once. If you close the modal window, you will have to create a new key to access it again.
- Copy Your API Key.
To copy the key, click the icon next to it.
Once you have copied your v3 API key, you can proceed to configure Pro Mail SMTP by pasting the key into the appropriate field in the plugin settings.
Step 4: Configure Pro Mail SMTP
Now that you have your Brevo API key, it’s time to configure Pro Mail SMTP to use Brevo for sending emails.
Install the Pro Mail SMTP Plugin
- Log in to Your WordPress Admin Area.
Access your WordPress dashboard. - Navigate to Plugin Installation.
Go to Plugins → Add New. - Search for Pro Mail SMTP.
In the search bar, type Pro Mail SMTP. - Install the Plugin.
Click on the Install Now button next to the plugin, and then activate it once the installation is complete. You can also choose to manually download the plugin from the official site and upload it to your WordPress installation..
Open Plugin Settings
- Access Pro Mail SMTP Settings.
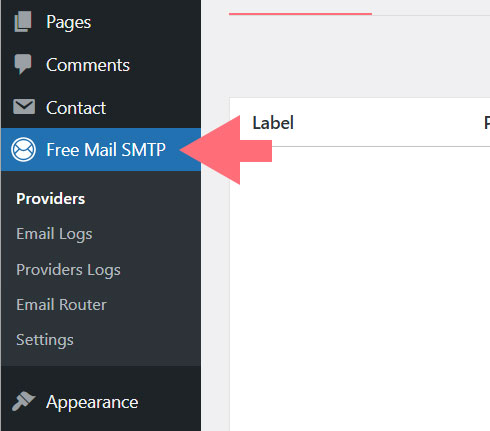
After activation, find Pro Mail SMTP in the left sidebar of your WordPress dashboard and click on it.
- Add a New SMTP Provider.
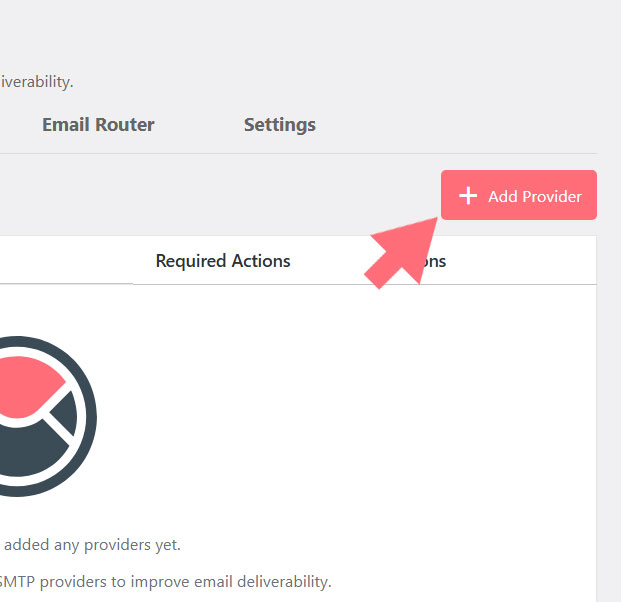
In the Pro Mail SMTP settings, click on the Add Provider button.
- Choose Brevo.
From the list of available SMTP providers, select Brevo.
Enter SMTP Configuration Details
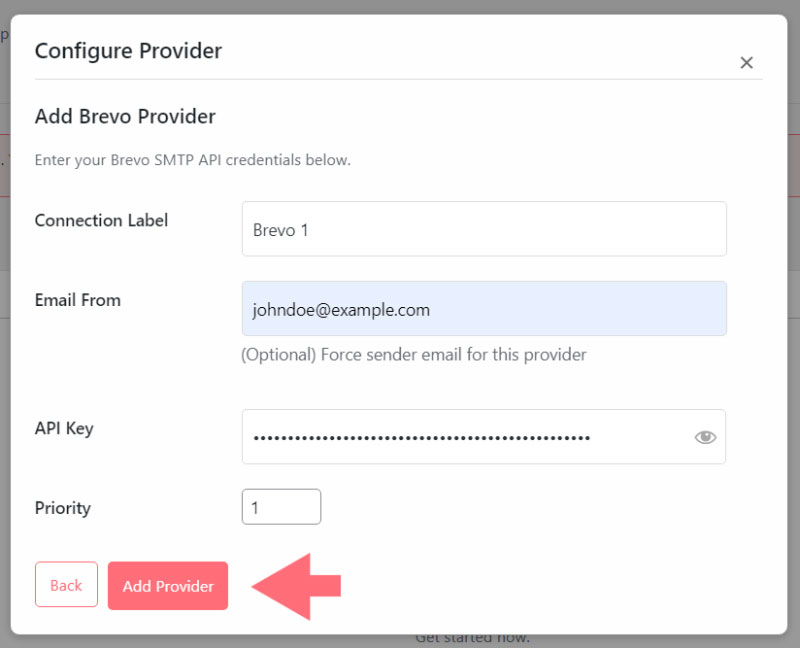
- Connection Label.
Assign a unique name to this connection for easy identification (e.g., Brevo Connection). - Email From (optional).
Specify the email address you wish to use for sending emails (e.g., noreply@example.com). This address can overwrite the global email settings for the selected provider.
💡Note
For best results, use a domain-specific email address (e.g., info@example.com) to enhance deliverability.
- API Key: paste the Brevo API key you copied earlier into this field. This key is essential for authenticating your connection with Brevo.
- Priority: assign a priority number to this connection. Lower numbers indicate higher priority in the fallback mechanism.
Optional Step: Backup Connection
Configuring a Backup Connection is optional and not necessary for completing your Brevo mailer setup. However, it is highly recommended to establish an additional connection to further enhance your email deliverability. This backup connection will automatically activate if your primary connection encounters any issues, ensuring uninterrupted email sending.
- Setting Up the Backup Connection.
If you decide to implement a backup connection, follow similar steps as you did for your primary connection. You can select a different SMTP provider or set up an alternative configuration with Brevo. - Save Your Changes.
After you have configured your mailer and any backup options, remember to click the Save Settings button to ensure all your configurations are applied.
Step 5: Save and Verify Your Setup
Once you’ve entered all the required details, click Save Settings to apply your configuration.
Next, navigate to the SMTP provider settings within the Pro Mail SMTP plugin and locate the Test option. Perform a test to verify that everything is set up properly.

Once the test completes successfully, your integration with Brevo is good to go.
Frequently Asked Questions about Brevo Integration.
How do I integrate Brevo with Pro Mail SMTP?
To integrate Brevo with Pro Mail SMTP, you need to create a Brevo account, verify your domain, generate an API key, and then configure the Pro Mail SMTP plugin in WordPress with these credentials.
What is the best SMTP plugin for Brevo integration?
Pro Mail SMTP is one of the best SMTP plugins for integrating with Brevo. It allows easy API key configuration and ensures high deliverability for WordPress emails.
Is Brevo good for transactional emails?
Yes, Brevo is highly reliable for transactional emails. It offers real-time analytics, high deliverability rates, and easy API integration for secure and timely email delivery.
Why are my Brevo emails going to spam?
Brevo emails might go to spam if your domain isn’t verified or your From Email address doesn’t match the domain. Make sure to authenticate your domain via DNS and use a domain-specific email.
How do I verify my domain in Brevo?
To verify your domain in Brevo, go to Senders & IP > Domains in your dashboard, add your domain, and follow the instructions to add the required DNS records (TXT, DKIM, and optionally DMARC).
Where do I find the Brevo API key?
You can generate and find your Brevo API key by logging into your account, going to SMTP & API > API Keys, and creating a new v3 key. Be sure to copy and store it securely.
Can I use Brevo for free?
Twilio SendGrid provides you with TXT and CNAME records to add to your DNS. These records verify your domain and are essential for successful email delivery. Always double-check values and allow time for DNS propagation.
What email address should I use with Brevo?
Yes, Brevo offers a free plan that allows you to send up to 300 emails per day. It’s ideal for small businesses or those just getting started with email marketing.
How do I test if Brevo SMTP is working?
After setting up Brevo in Pro Mail SMTP, use the Test function in the plugin settings to ensure the connection is working and that your emails are being sent successfully.
Do I need a DMARC record for Brevo email delivery?
While optional, adding a DMARC record is recommended—especially for Gmail and Yahoo recipients—as it improves email authentication and aligns with recent sender requirements.