Set Up Postmark SMTP for Reliable Email Delivery
Postmark ensures fast, reliable delivery of your transactional emails. Integrate it with WordPress to streamline communication and boost user engagement.
INTEGRATE POSTMARK FOR FREE
How to Set Up Pro Mail SMTP with Postmark
Postmark is a robust email delivery service designed to ensure that your transactional emails reach their intended recipients swiftly and reliably. With a focus on high deliverability and performance, Postmark is an ideal solution for businesses looking to enhance their email communication without the hassle of deliverability issues.
Integrating Postmark with Pro Mail SMTP allows you to take full advantage of its powerful features, ensuring that your emails are sent securely and efficiently.
This detailed guide will walk you through the essential steps to set up Postmark with Pro Mail SMTP, configure your email settings, and achieve a seamless email sending experience for your WordPress site. By following this guide, you’ll be equipped to optimize your email delivery and improve your overall communication strategy.
What is Postmark?
Postmark is a reliable email delivery service specifically designed for transactional emails. It ensures that your messages reach recipients quickly and efficiently, helping to improve user engagement.
With a straightforward API, integrating Postmark into your WordPress site is seamless and effective.
While the initial setup may take some time, the result is a dependable email delivery system that minimizes the risk of emails landing in spam folders. Postmark is an excellent choice for businesses looking to enhance their email communication.
Key Features:
Cost: Postmark offers a free developer plan that allows you to send up to 100 emails per month for testing purposes, without requiring a credit card. Once you are ready to send more emails, you can upgrade to a paid plan.
From Email Requirements: while Postmark works with various From Email addresses, it is recommended to use a domain-specific address (e.g., info@example.com) to optimize deliverability.
Bottom Line: Postmark is recognized for its reliability and competitive pricing, making it an excellent choice for businesses looking to improve their email delivery. The setup process may be a bit more involved than some other options, but the advanced features justify the effort.
Step 1: Create a Postmark Account
To integrate Pro Mail SMTP with Postmark, you first need to create an account.
Creating a Postmark Account
If you haven’t signed up for Postmark yet, here’s how to create your account:
- Visit the Postmark website.
Go to Postmark.com. - Sign up for a new account.
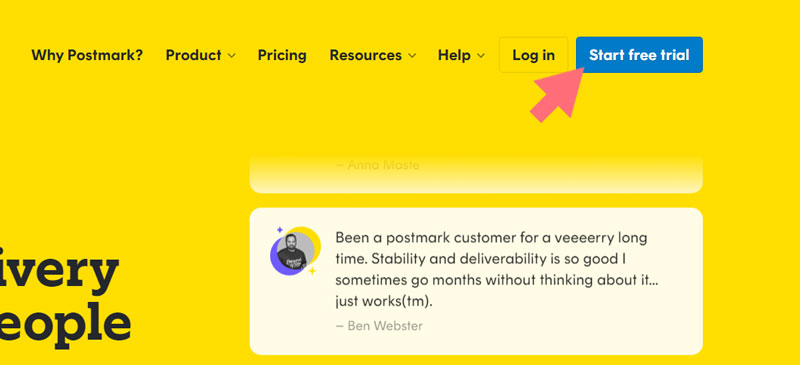
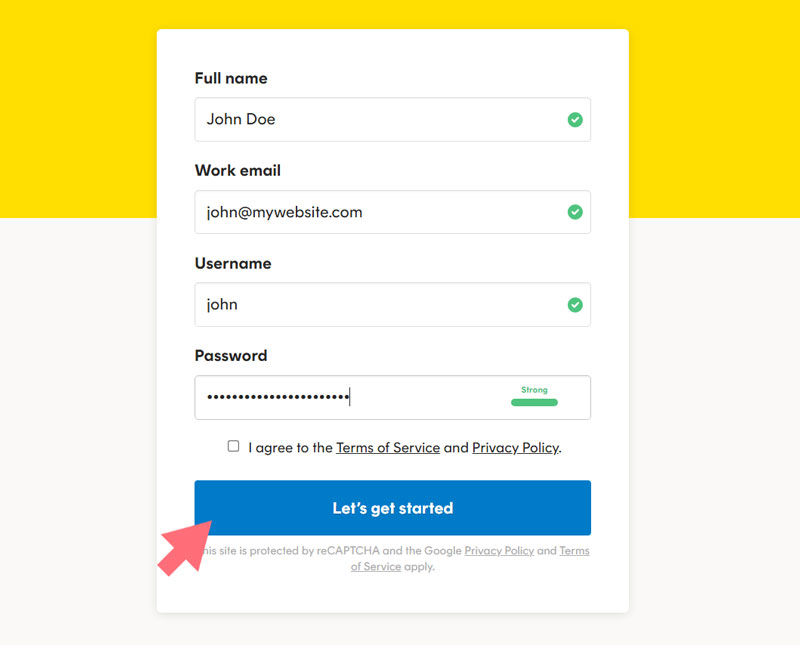
Click on the Start Free Trial button and complete the registration form with your details.
- Verify your email.
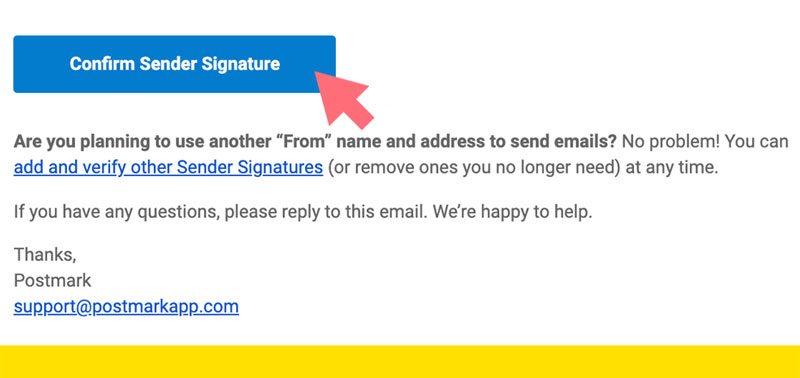
After signing up, check your email for a verification link from Postmark. Click on the Confirm Sender Signature button to activate your account.
- Log in to your dashboard.
Once your email is verified, log in to your Postmark account to access the dashboard.
After successfully creating and verifying your Postmark account, you are now set to move forward with the integration process. With your account ready, you can now proceed to configure your sender signatures and domain settings to maximize the effectiveness of your email communications.
Step 2: Configure Your Postmark Account
Now that your Postmark account is set up, the next step is to configure your account settings to ensure seamless email delivery. This involves adding a sender signature, which allows you to specify the email addresses you’ll use for sending emails, as well as verifying your domain to enhance deliverability.
Requesting Account Approval
- Find the request approval button.
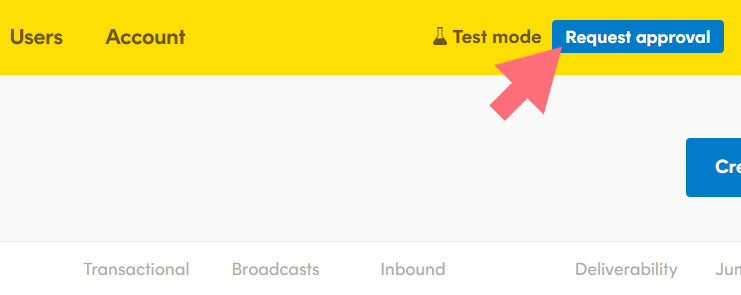
In the Postmark dashboard, look for the Request Approval button.
- Fill out the approval form.
Provide the necessary information about your intended email usage, including the estimated number of emails you plan to send.
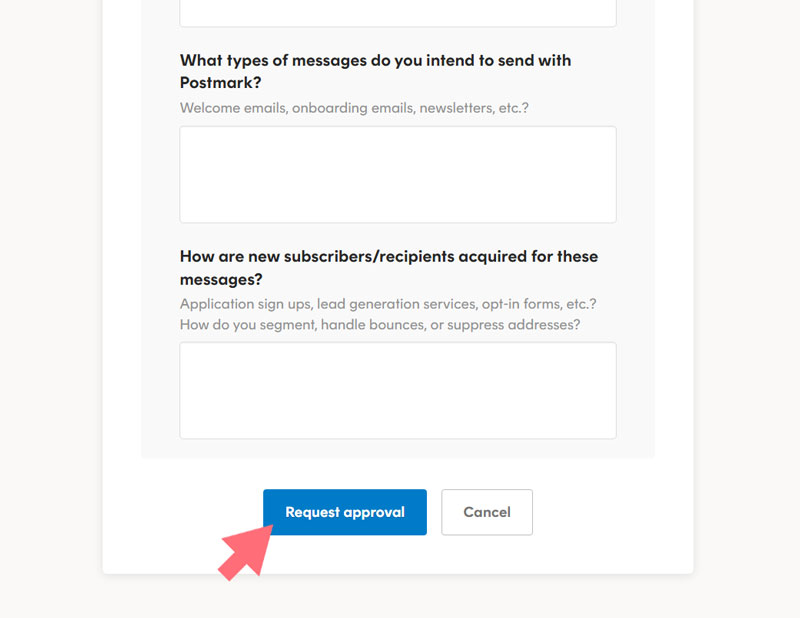
- Submit your request.
After submitting, you can continue with the setup while waiting for approval, which typically takes one business day.
Setting Up Your Sender Signature
- Navigate to sender signatures.
In your Postmark dashboard, click on Sender Signatures in the top menu.

- Add a new sender signature.
Click on the Add Domain or Signature button and then select Add Sender Signature.
Fill in the required fields, including the sender’s name and email address you wish to use for sending emails.
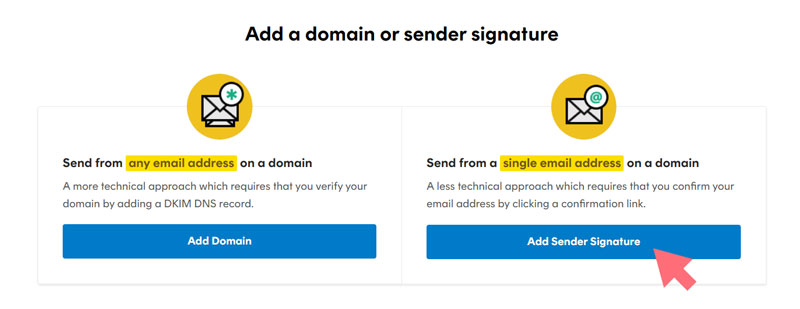
- Verify your sender signature.
After submitting, Postmark will send a verification email to the address you provided. Click the confirmation link in that email to complete the setup.
Adding a Domain
To ensure reliable email delivery, it’s important to verify your sending domain with Postmark. You can choose to verify a subdomain, which allows you to use an email address from that subdomain as the From Email in your Pro Mail SMTP settings.
This approach helps maintain a separate reputation for your subdomain, enhancing overall email deliverability.
- Navigate to the domains section.
In your Postmark dashboard, click on Sender Signature and then select Add Domain or signature. - Add a new domain.
Click on the Add Domain button to begin the verification process.
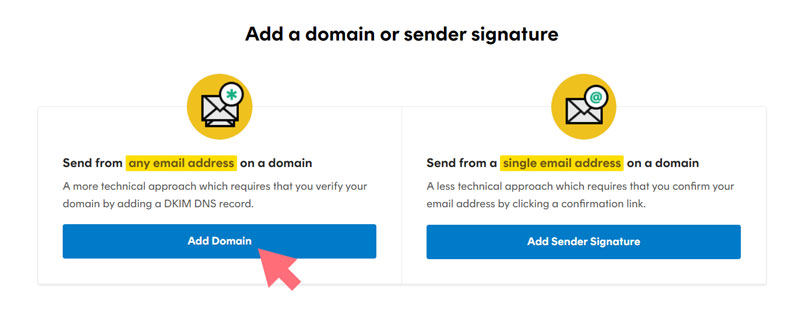
- Enter your domain information.
A popup window will appear where you need to enter the domain you want to verify (e.g., example.com). It is advisable to use a subdomain specifically for sending emails, such as mail.example.com or mg.example.com.
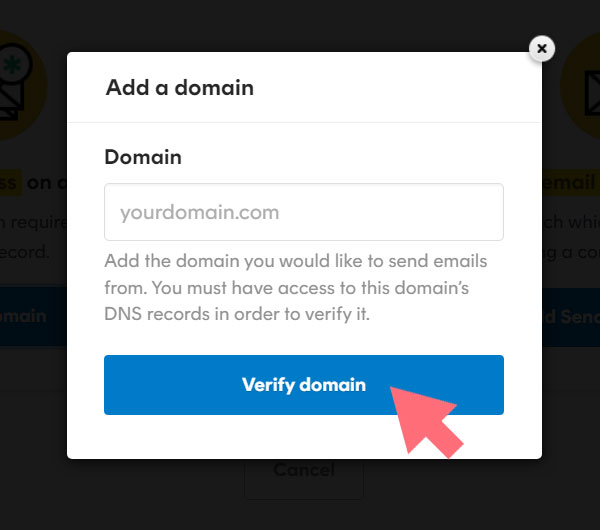
- Click the verify domain button.
After entering your domain, click the Verify Domain button. This will display the DNS records you need to add.
To complete the domain verification, you will need to add specific DNS records to your domain’s DNS settings. For guidance on this process, refer to your domain registrar’s documentation or consult Postmark’s resources.
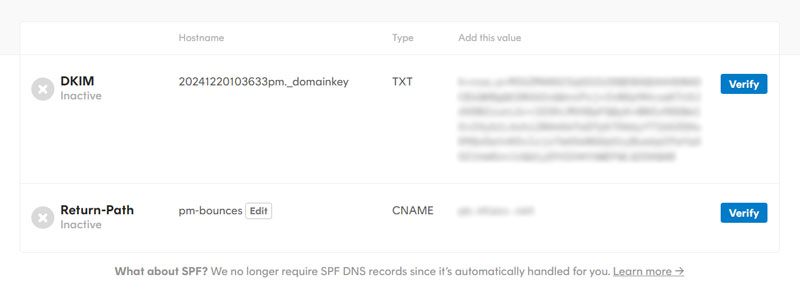
- Add DNS records.
Keep the Postmark verification page open while you add the provided DKIM and Return-Path records to your DNS settings. While adding the Return-Path record is not mandatory for verification, it is recommended to improve email deliverability. - Verify DNS records.
Once you’ve added the DNS records, return to the Postmark dashboard and click the Verify buttons next to each record.
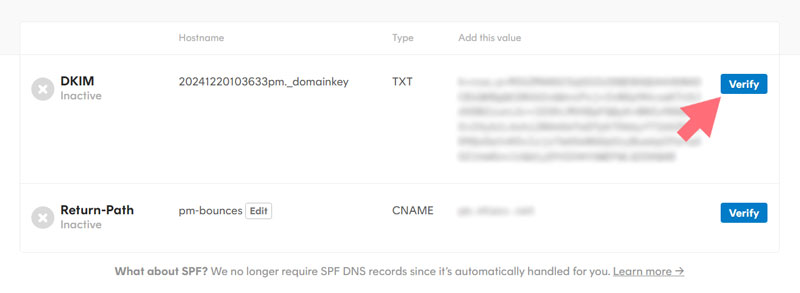
- Monitoring the verification status.
It may take up to 48 hours for DNS changes to propagate. If you attempt to verify your domain and it doesn’t work initially, wait a while and try again. In the meantime, you can continue with the setup process for Pro Mail SMTP.
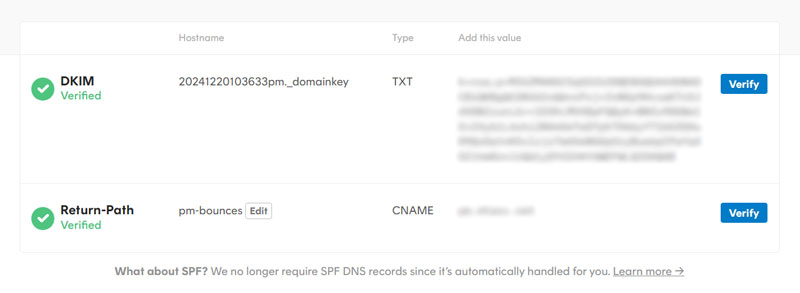
Once your domain is successfully verified, you will see green checkmarks and a Verified message next to each record, confirming that your domain is ready for sending emails.
Step 3: Generate Your Postmark API Token
To connect Pro Mail SMTP with Postmark, you will need your unique API token. This token authenticates your requests to Postmark’s email delivery service, ensuring that your emails are sent securely and efficiently.
In this step, we’ll guide you through the process of locating and generating your Postmark API token for seamless configuration.
- Log in to your Postmark account.
Access your dashboard. - Navigate to API tokens.
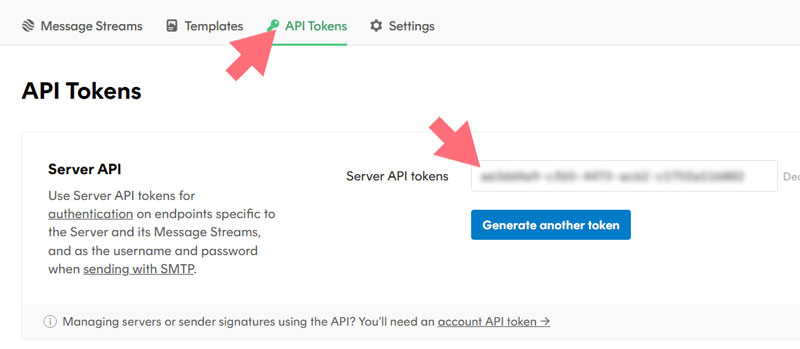
Click on Servers in the top menu and select the server you will use.
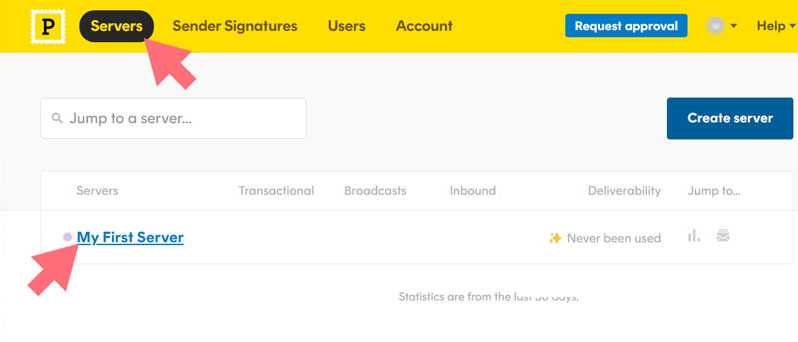
- Locate your API token.
Click on API Tokens to view your server’s API token. Copy this token for later use.
Step 4: Configure Pro Mail SMTP
Now that you have set up your Postmark account, it’s time to configure Pro Mail SMTP to use Postmark for sending emails.
Follow these steps to complete the setup:
Install Pro Mail SMTP plugin.
- Access Your WordPress Dashboard.
Log in to your WordPress admin area.
Go to Plugins → Add New and search for Pro Mail SMTP.
Click Install Now, then activate the plugin.
Alternatively, you can download Pro Mail SMTP directly here. - Open the Plugin Settings.
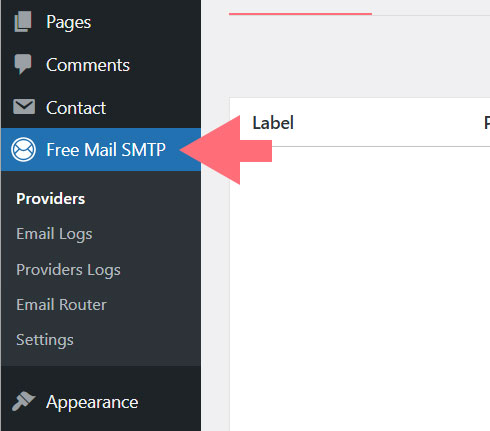
Once activated, find Pro Mail SMTP in the left-hand menu and click on it to access the settings.
- Choose Postmark as your email provider.
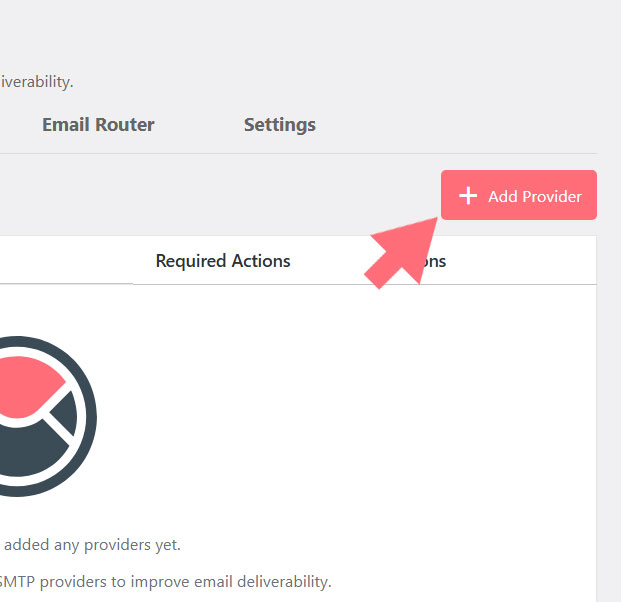
Click on Add New and select Postmark from the list of available SMTP services.
You’ll then be prompted to enter your Postmark API token and other required details to complete the configuration.
Enter SMTP Configuration Details
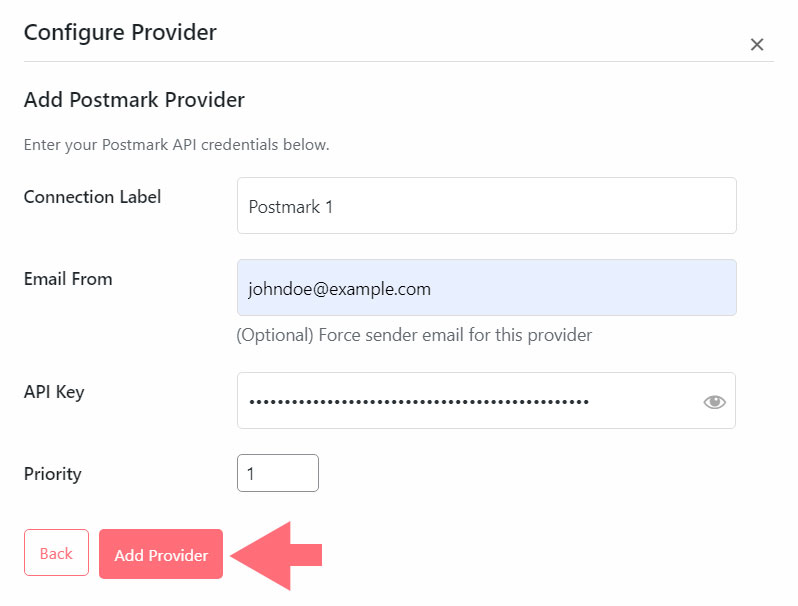
- Connection Label.
Give your connection a clear and unique name to easily identify it later (e.g., Postmark Connection). This is helpful when managing multiple SMTP setups. - Email From (optional).
Set the email address you want to use as the sender (e.g., noreply@yourdomain.com). This can override your site’s default sender settings.
💡Tip
for better email deliverability, use an address from the same domain you verified with Postmark (e.g., info@yourdomain.com).
- API Key.
Paste your Postmark API token here. You should have copied this key from your Postmark account during the setup process. It’s used to authenticate your connection securely. - Priority.
Set a priority number for this connection. Lower numbers are treated as higher priority. If you have multiple SMTP configurations, this helps determine which one is used first.
Step 5: Save and Test Your Configuration
Once you have completed all the fields, click the Save Settings button to store your configuration.
- Test Settings.
After saving your settings, look for the Test button within the Pro Mail SMTP Providers’ section.
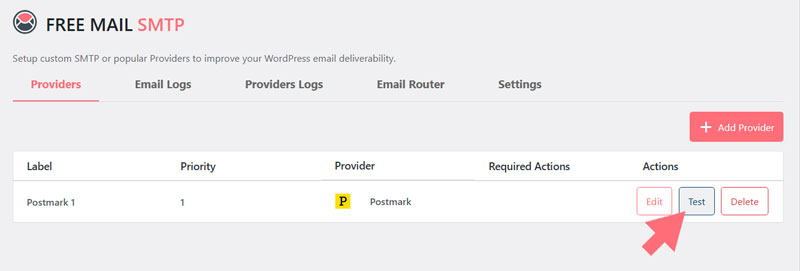
If the test is successful, your configuration is complete!
Frequently Asked Questions
How do I use Postmark SMTP in WordPress?
To use Postmark SMTP in WordPress, install a plugin like Pro Mail SMTP, select Postmark as your email provider, and enter your API token and verified domain. This allows you to send transactional emails securely and reliably.
What is the Postmark API key and where can I find it?
The Postmark API key is a unique token used to authenticate your account. You can find it in your Postmark dashboard under Servers > API Tokens. You’ll need it to connect your WordPress SMTP plugin to Postmark.
Can I use Postmark for free?
Yes, Postmark offers a free developer plan that lets you send up to 100 emails per month. This is ideal for testing your setup before upgrading to a paid plan with higher email volume.
Why is my Postmark email going to spam?
Emails may land in spam if your sending domain isn’t verified or if you’re not using a domain-specific sender address. To improve deliverability, verify your domain in Postmark and use addresses like info@yourdomain.com.
Do I need to verify my domain to use Postmark SMTP?
Yes, verifying your domain is recommended to ensure optimal deliverability. Postmark provides DNS records (DKIM and Return-Path) you must add to your domain settings for authentication.
Is Postmark better than traditional SMTP servers?
Postmark specializes in transactional email delivery and offers faster, more reliable delivery than many generic SMTP servers. It also includes built-in analytics and bounce handling, making it ideal for WordPress sites.
What is the difference between Postmark and other email providers?
Unlike general-purpose services like Mailgun or SendGrid, Postmark focuses solely on transactional emails, ensuring faster delivery and higher inbox placement rates for password resets, order confirmations, and notifications.
How do I test my Postmark SMTP connection in WordPress?
After entering your Postmark credentials in Pro Mail SMTP, click the Test button. This will verify your configuration. If everything is set up correctly, you’ll see a confirmation message indicating that the connection is working.
Can I use a free Gmail address with Postmark SMTP?
While you can try using a Gmail address, it’s strongly recommended to use a custom domain-based email (like you@yourdomain.com) for better authentication and email delivery performance.
How long does Postmark domain verification take?
DNS record propagation can take up to 48 hours. However, domains are often verified within a few hours after adding the DKIM and Return-Path records provided by Postmark.