Set Up TurboSMTP for Reliable Delivery
TurboSMTP offers high deliverability and full control over your email traffic. Easily connect it to WordPress via Pro Mail SMTP and start sending in just a few minutes.
INTEGRATE NOW FOR FREE
How to Set Up Pro Mail SMTP with TurboSMTP
Using Pro Mail SMTP together with TurboSMTP is an effective way to boost the deliverability of emails sent from your WordPress site. This setup ensures consistent performance, reduces the risk of messages ending up in spam, and helps you stay connected with your audience.
You can use this combination to power contact forms, order notifications, password resets, or marketing emails—without relying on unreliable default WordPress sending methods.
In this guide, you’ll learn how to configure TurboSMTP inside WordPress through Pro Mail SMTP, enter your credentials, and fine-tune your email settings for the best results.
What is TurboSMTP?
TurboSMTP is a professional-grade SMTP service that lets you send emails from your website or app with better speed, security, and control.
It offers features like bounce tracking, delivery analytics, and domain authentication. You can start for free with a limited daily quota, then upgrade to a paid plan when your email needs increase.
The setup process is simple, and once connected, you gain full visibility over your outgoing emails and improve overall inbox delivery.
Key Features:
Cost: TurboSMTP includes a free plan that lets you send up to 6,000 emails per month (maximum 200 per day) for an entire 12-month period. It’s a great option for testing, small websites, or low-volume transactional emails. When your needs grow, upgrading to a paid plan unlocks higher limits and more tools.
From Email Requirements: to maximize deliverability, it’s recommended to send emails from a verified, domain-based address (e.g., hello@yourdomain.com) rather than a generic email.
Bottom Line: TurboSMTP offers a solid mix of simplicity and power. It’s one of the top SMTP solutions for WordPress users who need fast, secure, and scalable email delivery without the setup headaches.
Step 1: Create a TurboSMTP Account
To start integrating Pro Mail SMTP with TurboSMTP, the first step is to create your TurboSMTP account.
Creating a TurboSMTP Account
If you don’t already have an account with TurboSMTP, follow these steps to sign up:
- Visit the TurboSMTP website.
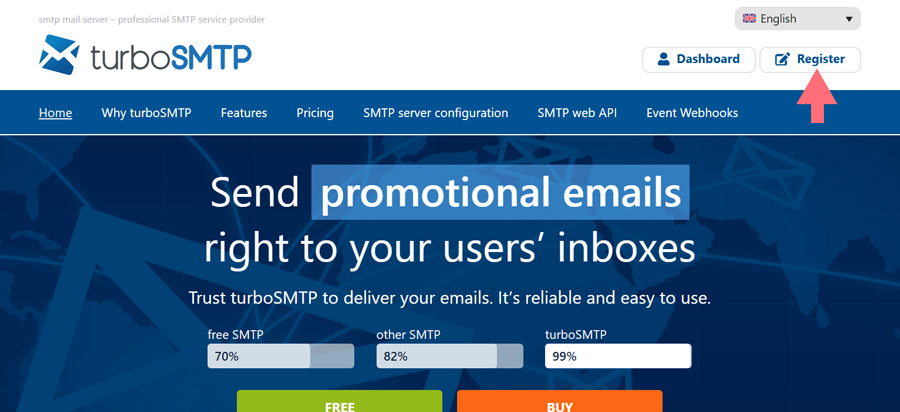
Go to TurboSMTP.com and click on the Register button at the top right of the page.
- Sign up for a free plan.
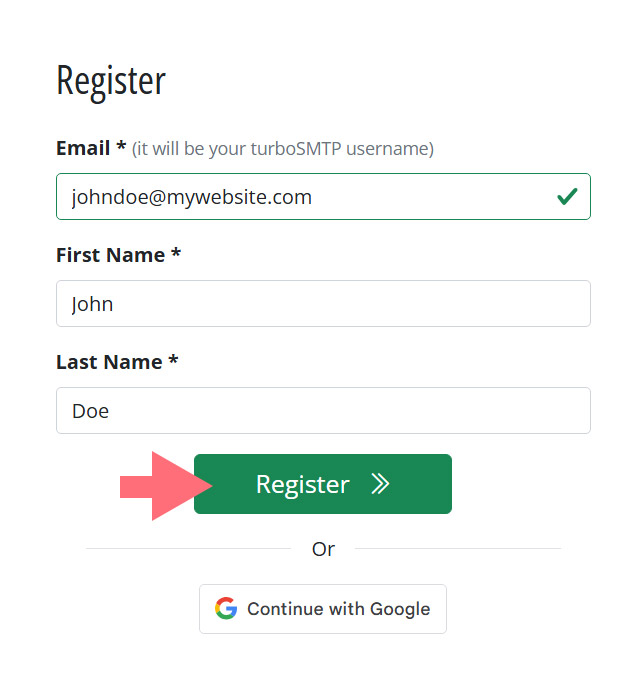
You’ll be redirected to the registration form. Enter your first name, last name and email address. Then click on Register.
- Complete the Signup Form.
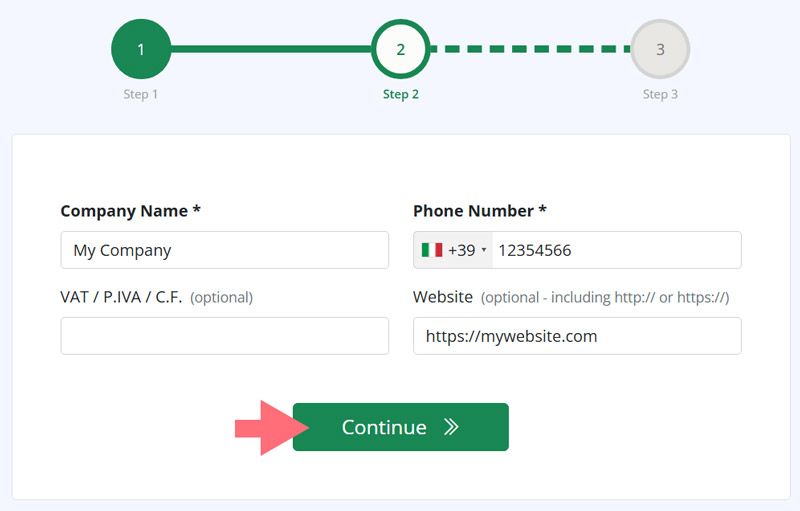
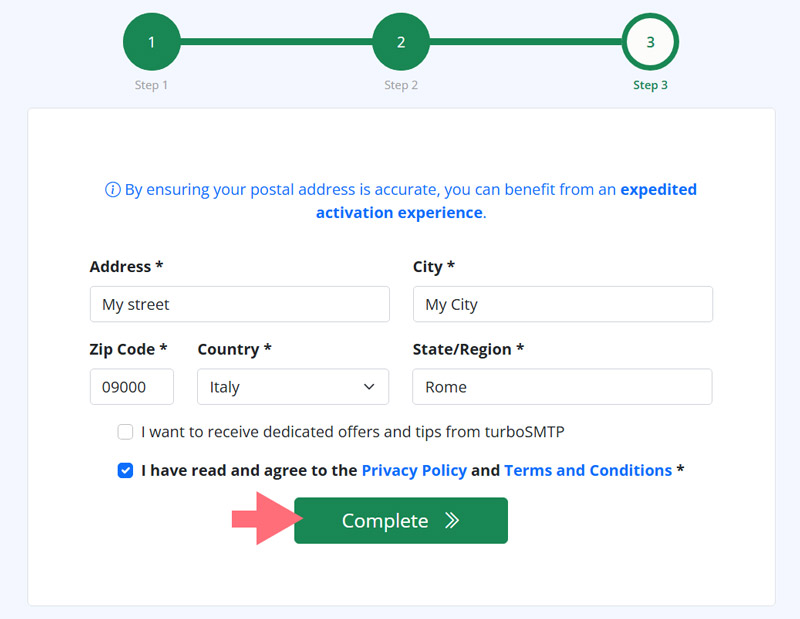
Fill in the required fields, including your Company name, address and phone number.
- Verify Your Email Address.
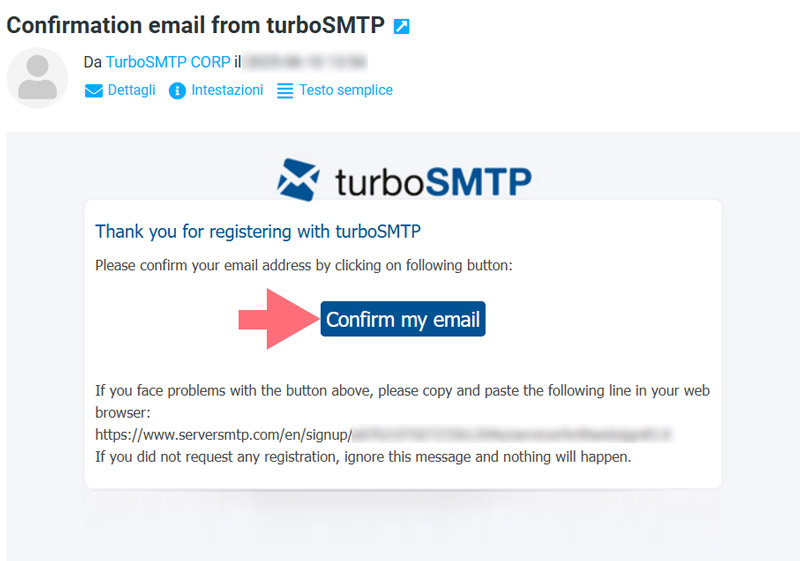
After signing up, you’ll receive a confirmation email. Open it and click the Confirm my email link to activate your account.
Check Your Welcome Email
After verifying your email, you’ll receive a welcome message from TurboSMTP.
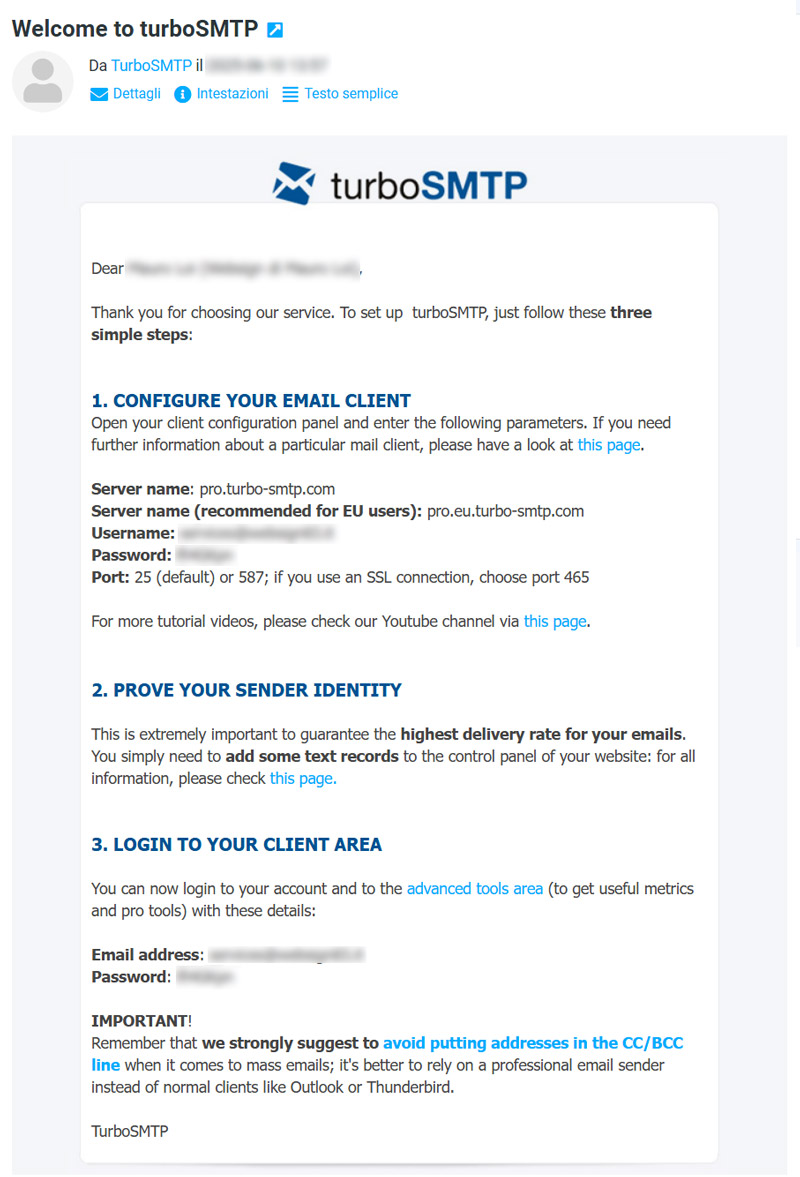
This email contains all the information you need to start sending emails, including:
- SMTP server name:
- pro.turbo-smtp.com (default);
- pro.eu.turbo-smtp.com (recommended for EU-based users).
- Port numbers:
- Port 25 or 587 (non-encrypted);
- Port 465 (for SSL encrypted connections).
- SMTP Username: your registered email address.
- SMTP Password: auto-generated and included in the email
To ensure better deliverability, TurboSMTP recommends verifying your sender domain by adding DNS TXT records (SPF/DKIM) to your domain’s control panel. A link to the setup instructions is included in the welcome email, or you can access it here.
Step 2: Add Your Sender Domain in TurboSMTP
After creating your account, the next essential step is to verify your sender domain. This improves your email deliverability and ensures your messages are authenticated properly.
- Access the Getting Started Page.
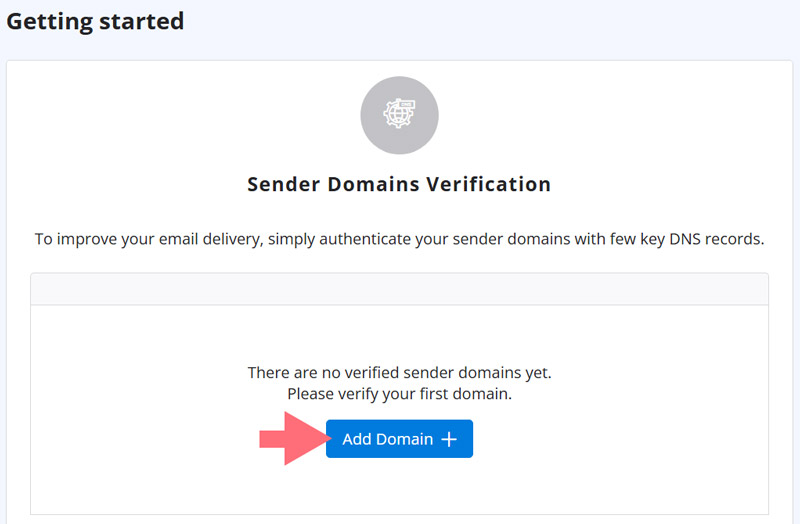
Once logged into your TurboSMTP dashboard, you’ll be taken to the Getting Started page. Here, you’ll see a message indicating that no domains have been verified yet.
Click the Add domain button to begin the setup process.
- Add a New Domain.
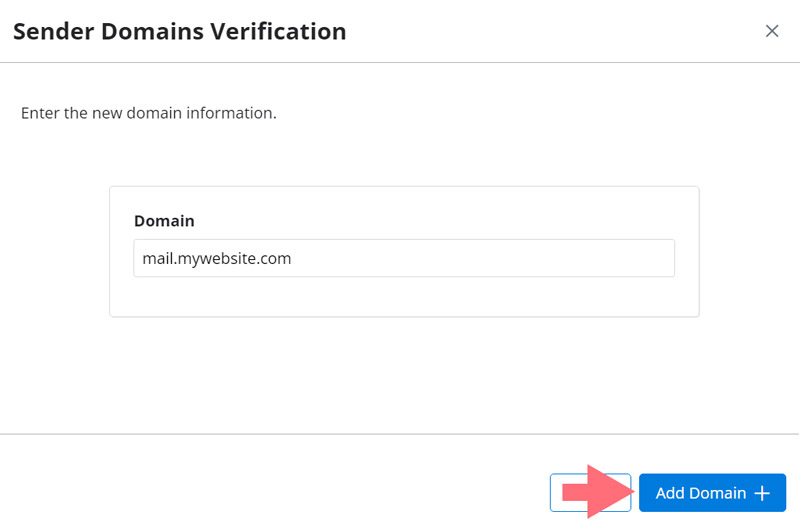
You’ll be prompted to enter the domain you plan to send emails from (e.g., yourdomain.com).
It’s recommended to use a subdomain dedicated to email (such as mail.yourdomain.com) for better organization and control.
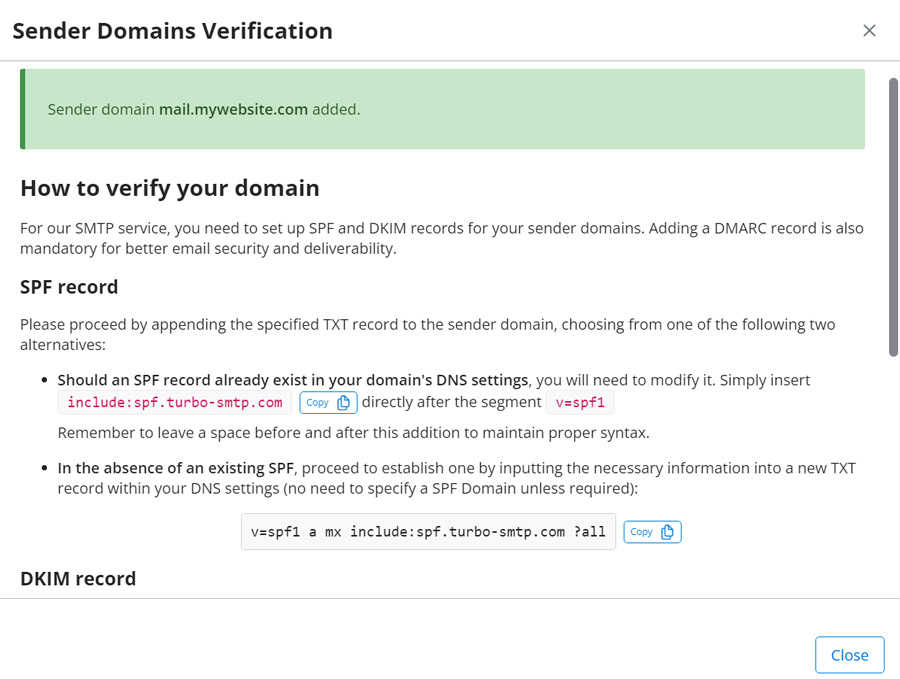
- Add the Required DNS Records.
After submitting your domain, TurboSMTP will provide a list of DNS records you need to add to your domain’s DNS settings:
– SPF record
– DKIM record
– (Optionally) a DMARC record for additional authentication
Each record will come with detailed values and instructions, which you can copy and paste into your DNS provider’s dashboard (like Cloudflare, GoDaddy, etc.).
How to Add DNS Records
- Log in to your domain registrar or DNS provider (e.g., GoDaddy, Namecheap, Cloudflare).
- Access your DNS Settings or DNS Zone Editor.
- Carefully copy and paste each record as provided in your TurboSMTP dashboard.
- If prompted, set the TTL to 86400 seconds (24 hours) or use the default setting.
- Save the changes.
💡Note
Some providers require simplified hostnames. For example, if the full record is mail._domainkey.yourdomain.com, you may only need to enter mail._domainkey.
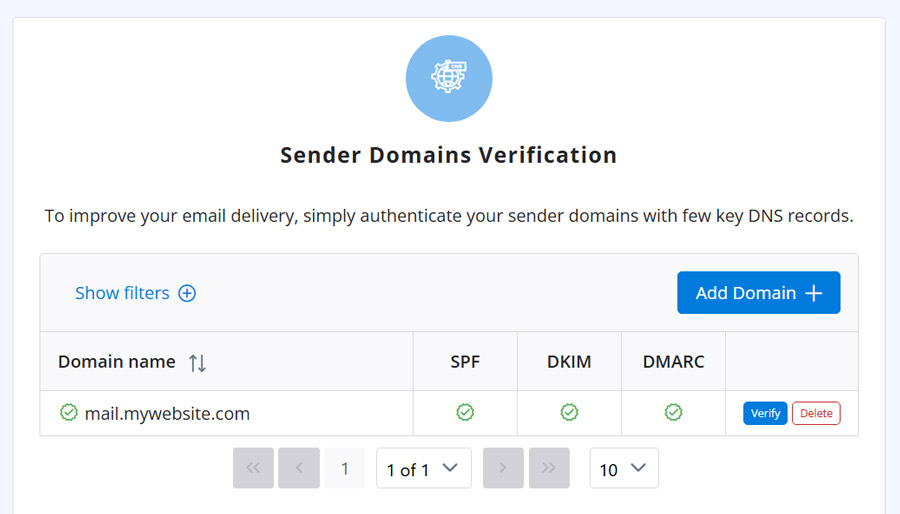
Wait for DNS Propagation
Once you’ve added all the records:
- TurboSMTP will automatically check their status.
- DNS changes may take anywhere from a few minutes to 24–48 hours to propagate.
- You can monitor verification status directly from the dashboard.
When the domain is successfully verified, you’ll be ready to send authenticated emails with better inbox placement.
Step 3: Configure Pro Mail SMTP with TurboSMTP
Now that you’ve verified your domain with TurboSMTP, it’s time to connect your WordPress site using the Pro Mail SMTP plugin. This will ensure your emails are sent securely and reliably through TurboSMTP’s servers.
Follow these steps to complete the setup.
Install the Pro Mail SMTP Plugin
- Access Your WordPress Dashboard.
Log in to your WordPress admin area. - Navigate to Plugin Installation.
Go to Plugins → Add New. - Search for Pro Mail SMTP.
In the search bar, type Pro Mail SMTP.
Click on the Install Now button next to the plugin, and then activate it once the installation is complete. Otherwise you can download the Pro Mail SMTP by clicking here. - Open Plugin Settings.
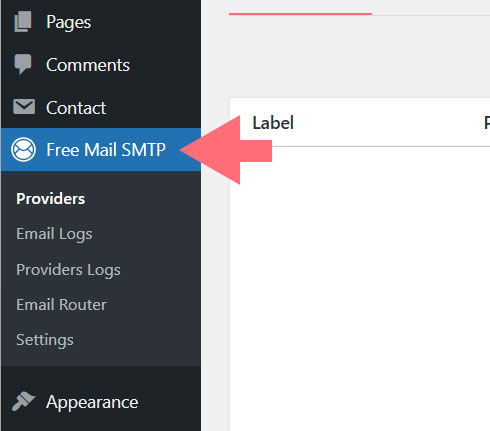
After activation, find Pro Mail SMTP in the left sidebar of your WordPress dashboard and click on it.
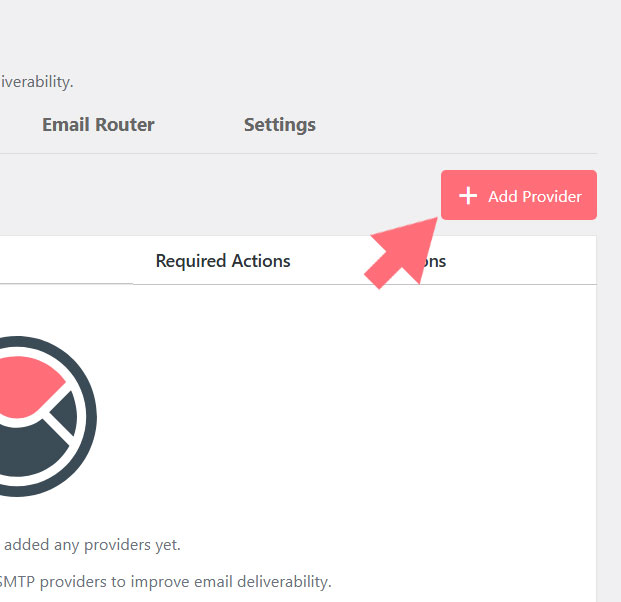
- Select TurboSMTP as Your SMTP Provider.
Click on the Add New button and choose TurboSMTP from the list of available SMTP providers.
Generate Your TurboSMTP API Key
To connect Pro Mail SMTP with TurboSMTP, you’ll need to generate an API Key from your TurboSMTP dashboard. This key allows Pro Mail SMTP to authenticate and send emails securely using TurboSMTP’s infrastructure.
- Log in to Your TurboSMTP Account.
Access turbosmtp.com and log in with your credentials. - Open the API Key Section.
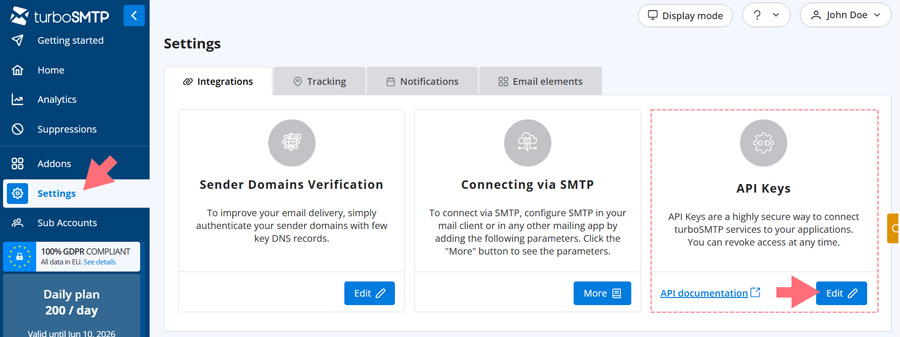
From the left-hand menu, click Settings. Select the Integrations tab.
In the API Keys section, click the Edit button.
- Create a New API Key.
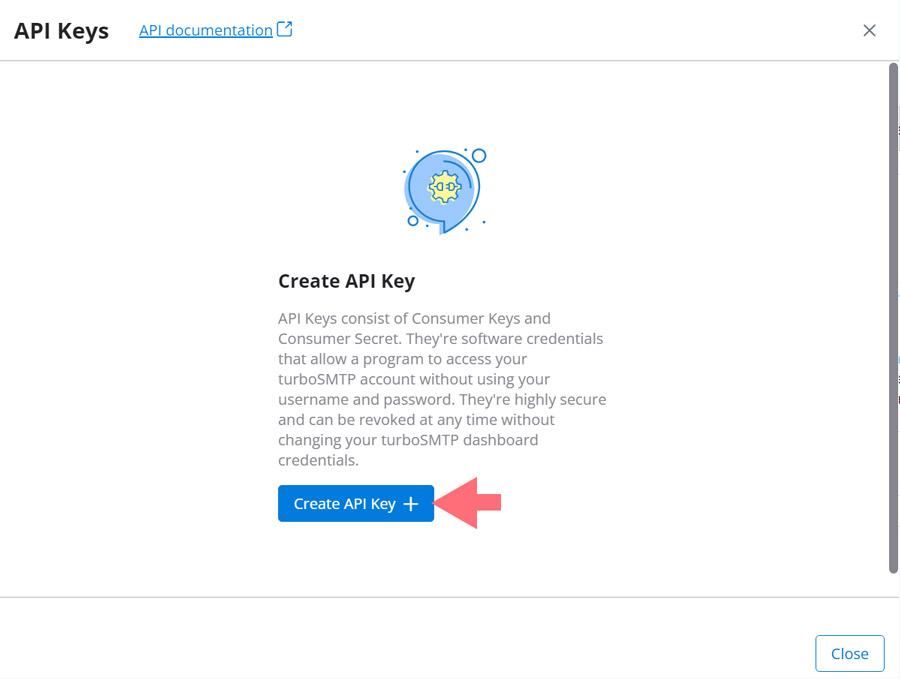
Click Create API Key.
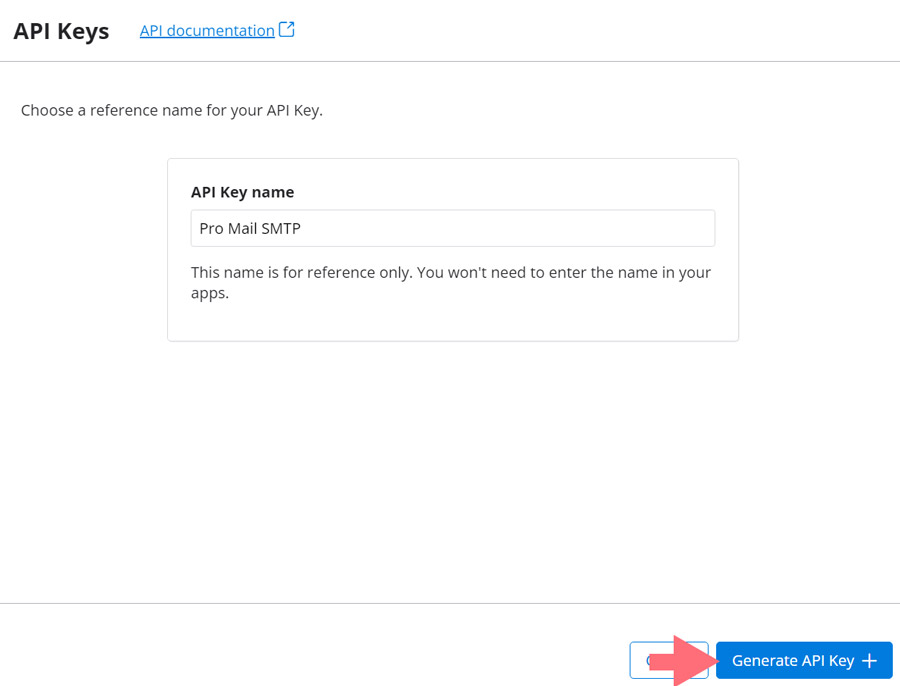
Enter a name for your key (for example, Pro Mail SMTP) to help you identify its purpose later.
Click Generate API Key.
- Copy Your API Credentials.
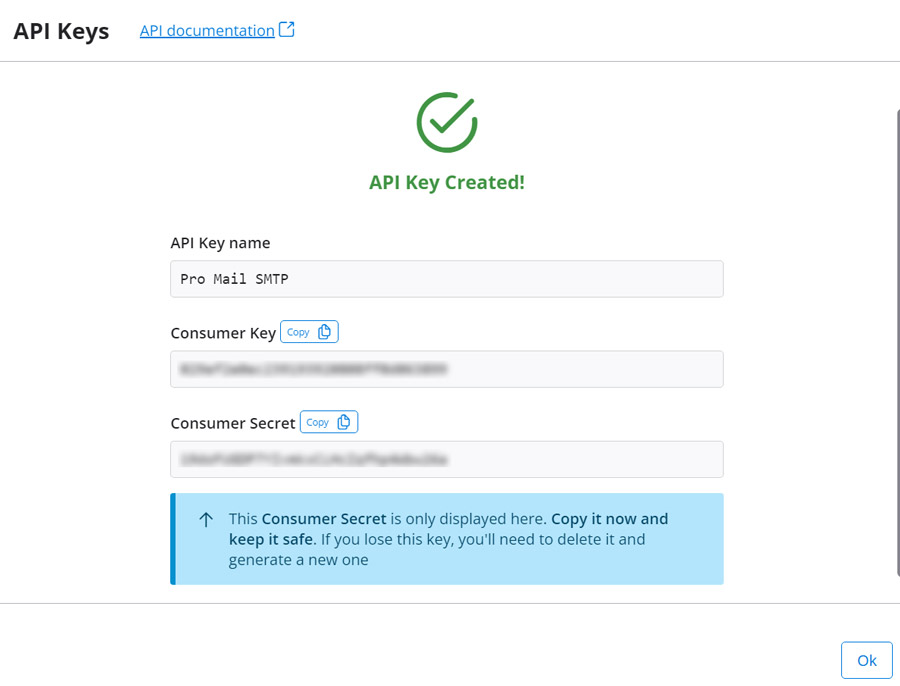
Once the key is generated, you’ll see your Consumer Key and Consumer Secret.
A prompt will appear allowing you to add a description for your new API key. Choose a descriptive name that will help you remember its purpose.
Click OK to return to the list of generated API Keys.
⚠️ Important
Your Consumer Secret will only be shown once. Copy and save it securely: you’ll need both the Consumer Key and Secret to configure Pro Mail SMTP.
Enter SMTP Configuration Details
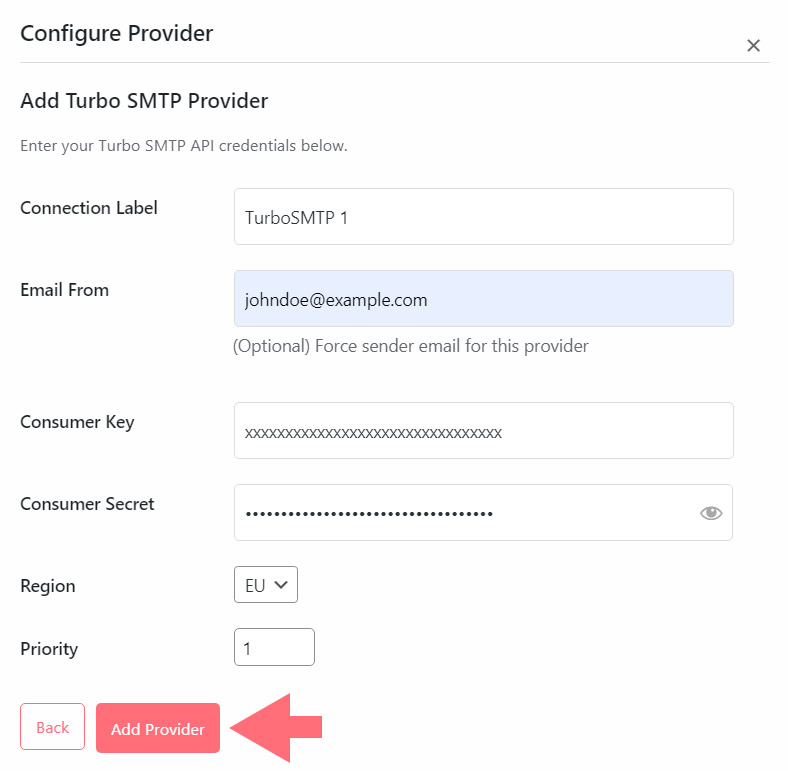
Once you’ve installed the Pro Mail SMTP plugin and generated your TurboSMTP API Key, it’s time to complete the configuration by entering your SMTP connection details.
- Connection Label.
This field helps you identify your TurboSMTP connection in the list of available SMTP setups. Choose a clear and descriptive name, such as TurboSMTP Main, especially if you plan to set up multiple connections. - Email From (optional).
In this field, enter the email address you want to use as the sender (e.g., noreply@yourdomain.com). This will override the default “From” address in your WordPress settings if specified.
💡Tip
For better deliverability and authentication, always use a domain-based sender address (like info@yourdomain.com) rather than a free email like Gmail or Yahoo.
- API Key.
Paste the Consumer Key from your TurboSMTP dashboard here. Then, enter the Consumer Secret in the appropriate field . These credentials authenticate your connection with TurboSMTP. - Domain.
Enter the domain or subdomain you previously verified in TurboSMTP (e.g., mail.yourdomain.com). - Priority.
Use this field to assign a priority level to the connection. Lower numbers have higher priority — for example, set this connection to 10 if you want it to be the primary SMTP route.
If the primary connection fails, Pro Mail SMTP will automatically fall back to the next available one based on priority.
Step 4: Save Your Settings
Once you have completed all the fields, click the Save Settings button to store your configuration.
- Test Settings.
After saving your settings, look for the Test button within the Free Mail SMTP Providers’ section.

If the test is successful, your configuration is complete!
Frequently Asked Questions about TurboSMTP Integration.
How do I set up TurboSMTP with WordPress using Pro Mail SMTP?
To connect TurboSMTP to WordPress, install the Pro Mail SMTP plugin, generate an API key from your TurboSMTP dashboard, and configure the plugin with your credentials and verified domain. This ensures reliable email delivery and fewer messages in spam.
Is TurboSMTP compatible with the Pro Mail SMTP plugin?
Yes, TurboSMTP integrates seamlessly with Pro Mail SMTP. You can configure it in minutes to send WordPress emails like form submissions, notifications, and password resets with improved deliverability.
What are the SMTP settings for TurboSMTP?
TurboSMTP’s SMTP server settings are:
– Host: pro.turbo-smtp.com or pro.eu.turbo-smtp.com
– Port: 587 (TLS), 465 (SSL), or 25
– Authentication: Required
– Username: Your registered email
– Password: Provided in your welcome email
Why should I use TurboSMTP instead of WordPress’s default email function?
WordPress’s built-in mail function (wp_mail) often causes emails to land in spam or not arrive at all. TurboSMTP uses authenticated, secure SMTP protocols to ensure your emails are delivered reliably.
Is there a free plan available for TurboSMTP?
Yes, TurboSMTP offers a free plan with up to 6,000 emails per month (max 200 per day) for 12 months, ideal for small businesses, test environments, or low-volume transactional emails.
How do I verify my domain in TurboSMTP for better email deliverability?
Log in to your TurboSMTP account, add your sending domain, and follow the instructions to add SPF, DKIM, and DMARC DNS records. This step is essential to prevent your emails from being marked as spam.
What should I enter in the “Email From” field in Pro Mail SMTP?
Use a verified, domain-based email (e.g., hello@yourdomain.com) in the “From Email” field. Avoid using free email services like Gmail or Yahoo, as they can harm deliverability.
Can I use TurboSMTP with contact forms or WooCommerce emails?
Absolutely. Once configured, TurboSMTP works with all types of WordPress-generated emails, including contact form submissions, WooCommerce order confirmations, and password reset emails.
How can I test if my TurboSMTP configuration is working in WordPress?
After saving your SMTP settings in Pro Mail SMTP, use the built-in “Test” function. You’ll get an immediate result indicating whether the connection is valid and emails can be sent successfully.
Is TurboSMTP better than WordPress default email sending?
Yes,TurboSMTP offers significantly better deliverability and reliability compared to WordPress’s default wp_mail() function. WordPress uses PHP mail by default, which often leads to emails being flagged as spam or not delivered at all. By integrating TurboSMTP via Pro Mail SMTP, you ensure authenticated sending, SPF/DKIM support, bounce tracking, and better inbox placement. It’s the recommended solution for transactional and marketing emails from WordPress.